The Ugly Truth About Growing Leeks (And How to Fix It)
Let’s be honest: most allotment leeks are a disappointment. You see those prize-winning specimens at the village show – thick as a wrist, white stems a foot long – and you assume you need some secret fertiliser or a magic incantation. The reality is far simpler and much more frustrating. The number one reason leeks fail on UK plots is a simple, tragic mistake: planting them in loose, fluffy compost. I see it every March on my Yorkshire site. New plotters lovingly fill a trench with multi-purpose compost, dib a hole, drop in a leek, water it in… and then watch it produce a spindly, green stalk no thicker than a pencil. You’ve given them a five-star hotel, and they’ve given you the allotment equivalent of a limp celery stick. Leeks are not carrots. They don’t need soft soil to swell. In fact, they crave resistance. They are the ultimate tough-love crop. To get that iconic, blanched white stem, you need to subject them to a bit of hardship. You need the dibbing method, a bit of patience, and a strategy that works with your soil, not against it. This is the no-nonsense, science-backed guide to growing leeks that will make your neighbours jealous and your winter stews legendary.
Why Dibbing Leeks Beats Trench Planting Every Time
If you’ve read old gardening books, they’ll tell you to dig a V-shaped trench, fill it with manure, and gradually backfill as the leek grows. This works. It’s also an absolute back-breaking faff. The modern, evidence-based method preferred by top allotment growers is the dibber method. It’s faster, requires less soil disturbance (better for soil structure and weed control), and produces superior stems. Here’s why: when you make a deep hole (about 15-20cm deep) with a dibber and drop the leek in, you do not backfill the hole with soil. You simply water it in. This is the critical step. The water washes a tiny amount of soil around the roots, but the bulk of the stem sits in an air pocket. The leek, sensing this instability, grows thicker and stronger to anchor itself. It’s a form of controlled stress that triggers stem expansion. The blanching happens naturally because the stem is below the soil surface and excluded from light. No earthing up required. No trench digging. Just a dibber, a strong wrist, and the right timing.
The Perfect Dibber Technique: A Step-by-Step Checklist
You need a proper dibber. A spade handle or a thick wooden broom handle works perfectly (about 5cm diameter, tapered to a blunt point). Your leek seedlings should be pencil-thick – about 15-20cm tall.
- Prepare the bed: You want a firm, level, weed-free surface. Do not dig a trench. Just rake it flat. If you have heavy clay, a light forking is fine, but then firm it down with your feet. Leeks love firm soil.
- Make the hole: Plunge your dibber straight down, 15-20cm deep. Twist it slightly to create a clean, round hole. Space holes 15cm apart in rows 30cm apart. For winter leeks, you can push it to 20cm spacing.
- Trim and drop: Trim the roots of your leek seedling to about 2.5cm, and trim the leaves back by a third (this reduces transpiration and stops the plant flopping over). Drop the seedling into the hole. It should reach just to the first leaf fork.
- Water in (and only water): Fill the hole with water from a watering can with a rose. Do not push soil in. The water will settle the roots. The hole will gradually refill with soil over the next week from rain and wind. This is natural blanching.
You will be tempted to fill the hole with compost. Do not do it. Trust the process. You will see results in 3-4 weeks when the stem starts to visibly swell.
Choosing Your Leek: The Battle of the Seasons
Not all leeks are created equal. The variety you choose dictates your entire growing calendar. You have two main camps: summer/autumn leeks and winter leeks. For deep winter stews and that classic flavour, winter leeks are non-negotiable. They are bred to withstand frost and snow, and they actually sweeten after a hard frost as the plant converts starches to sugar (a natural antifreeze). Summer leeks, by contrast, are faster-growing but have a thinner, more tender stem and less cold hardiness. They bolt (run to seed) if hit by a cold snap.
| Type | Example Varieties (UK) | Sow Indoors | Transplant to Allotment | Harvest Window | Key Trait |
|---|---|---|---|---|---|
| Summer/Autumn | ‘King Richard’, ‘Jolant’ | Feb-Mar | May-Jun | Aug-Nov | Fast grower, tender stem, not frost hardy |
| Winter Hardy | ‘Bandit’, ‘Toledo’ | Apr | Jun-Jul | Dec-Apr | Thick stems, excellent blanch, frost sweetens flavour |
| Late Season | ‘Musselburgh’ (Heritage), ‘Carentan’ | Apr-May | Jul | Feb-May | Extremely hardy, thick blue-green leaves, traditional |
Recommendation: For the most reliable crop for winter eating, sow ‘Bandit’ or ‘Musselburgh’ in April. Sow them in a seedbed or modular trays. They don’t need heat – a cold frame or unheated greenhouse is perfect. Harden them off well before transplanting in June or July.
The Art of Blanching: Giving Your Leeks a White Collar
Blanching is simply the process of excluding light from the stem to prevent chlorophyll production, keeping it white, tender, and mild. The dibbing method does 80% of the work for you. But for extra-long white stems, you can use a simple trick: leek collars. Take a length of corrugated cardboard (about 15cm wide and 30cm long). Wrap it around the stem of the leek in early autumn, securing it with a rubber band or twine. Push the base of the collar slightly into the soil. The cardboard blocks light, and as the leek grows, it pushes upwards inside the collar, creating more white stem. This is a classic Victorian technique that works brilliantly on UK allotments. It also has a bonus: it stops soil getting into the leaf axils, which is a common complaint when eating leeks. The cardboard will naturally biodegrade over winter. Do not use plastic pipes – they trap moisture and cause rot.
Feeding for Thickness: Less is More
Leeks are not greedy feeders, but they do need a steady supply of nitrogen. The mistake is to over-feed early on, which produces lush, soft growth that attracts allium leaf miner and is prone to fungal diseases. Adopt a ‘little and often’ approach starting in August. Use a high-nitrogen liquid feed, like a diluted comfrey tea or a seaweed feed (Vitax Q4 liquid is a reliable UK option). Apply it every two weeks until October. Do not feed after October – you want the plant to harden off for winter, not produce new, frost-tender growth. If your soil is heavy clay, a dusting of sulphate of potash in September will help thicken the stems and improve winter hardiness.
Pest and Disease: The Real Threats
Leeks are remarkably resilient, but they have two persistent enemies: allium leaf miner and leek rust. For the leaf miner, the best control is physical exclusion. Cover your leek bed with fine insect mesh (enviromesh) immediately after transplanting. Keep it on until October. This stops the adult fly laying eggs. It also stops leek moth. For leek rust (orange pustules on the leaves), the cause is usually stress – poor drainage, overcrowding, or lack of potassium. Improve drainage by growing on ridges or raised beds. Ensure good spacing (20cm is ideal). If rust appears, remove affected leaves and burn them. Do not compost them. There are no effective organic fungicides for rust, but a feed with high-potassium liquid feed can help the plant fight it off.
FAQ: Your Leek Growing Questions, Answered
Q: My leek seedlings are thin and leggy. Can I still plant them?
A: Yes, but do not trim the roots as much. Dib a shallower hole (10cm). The risk is they will be too weak to push up against the soil. Give them a liquid seaweed feed a week after planting to boost root growth.
Q: When is the best time to harvest leeks for storage?
A: Winter leeks are best left in the ground until needed. They store perfectly in situ. For summer leeks, harvest before the first hard frost. You can store them in a cool shed in a bucket of damp sand for 4-6 weeks.
Q: My leeks have thick stems but they are green all the way down. What went wrong?
A: You didn’t dib them deep enough, or you backfilled the hole. The stem was exposed to light. Next year, make the hole at least 20cm deep. For existing plants, use the cardboard collar trick immediately to try and salvage them.
Q: Can I grow leeks in the same bed as onions?
A: Avoid it. They are both alliums and share the same pests and diseases (especially white rot). Practice a 3-4 year crop rotation. Follow brassicas or legumes, not other alliums.
Q: What is the secret to leeks as thick as my arm?
A: It’s 90% variety choice and 10% technique. Use a winter variety like ‘Toledo’ or ‘Bandit’. Ensure you have firm soil. Do not over-water. Feed with potassium in late summer. And most importantly: give them a long growing season. Sow in April, plant in June, harvest in February. Patience is the real secret.
The Final Stew: Putting It All Together
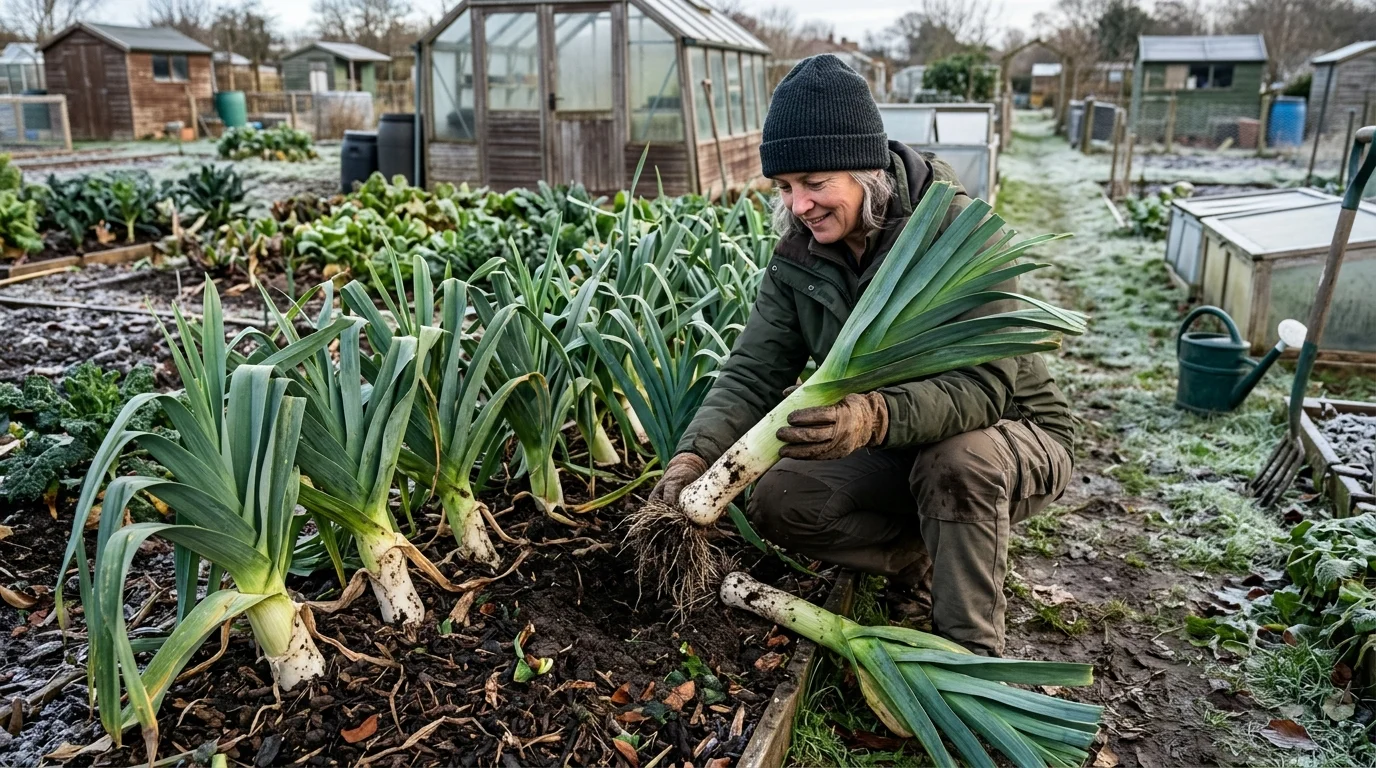
Growing huge leeks on your allotment is not about magic potions or back-breaking labour. It is about understanding one simple principle: leeks need resistance to thrive. The dibbing method gives them that. The right variety gives you a harvest window that spans the hungriest months. And a bit of cardboard gives you the blanched stem of your dreams. Plant them in firm soil, water them in, and then walk away. Let them do the hard work. By February, when the frost is on the ground and you are pulling a thick, sweet ‘Bandit’ from the frozen earth, you will understand why this humble allium is the backbone of the winter plot. It is the ultimate ‘grow smarter, not harder’ crop. Now go get your dibber dirty.