You’ve cleared your plot, prepped the soil, and now you want a fruit bush that doesn’t throw a tantrum. Enter the gooseberry.
Let’s be real for a second. Many plotters look at gooseberries and think, “Prickly, disease-prone, and who actually eats them?” But I’ve spent 15 years on heavy Yorkshire clay, and I can tell you this: a well-managed gooseberry bush is the most reliable cropper on your allotment. They’ll produce kilos of fruit from a tiny footprint, tolerate a bit of neglect, and – if you choose the right varieties – give you sweet, dessert-quality berries that cost a fortune in the shops.
The catch? Two things: gooseberry sawfly can strip a bush naked in 48 hours, and pruning bushes incorrectly can turn a productive plant into a spiky mess. This guide is your no-nonsense blueprint for growing gooseberries on an allotment, from planting bare-root whips to picking perfect dessert gooseberries. Let’s get scientific, not sentimental.
Why gooseberries deserve a prime spot on your plot
Gooseberries are the unsung heroes of the UK fruit garden. Unlike raspberries that spread like bindweed or strawberries that need constant replacing, a single gooseberry bush will produce 4-5 kg of fruit annually for 15 years or more. They’re self-fertile, meaning one bush is enough, and they thrive in our cool, damp climate. In fact, they prefer it – too much heat and the fruit scorches.
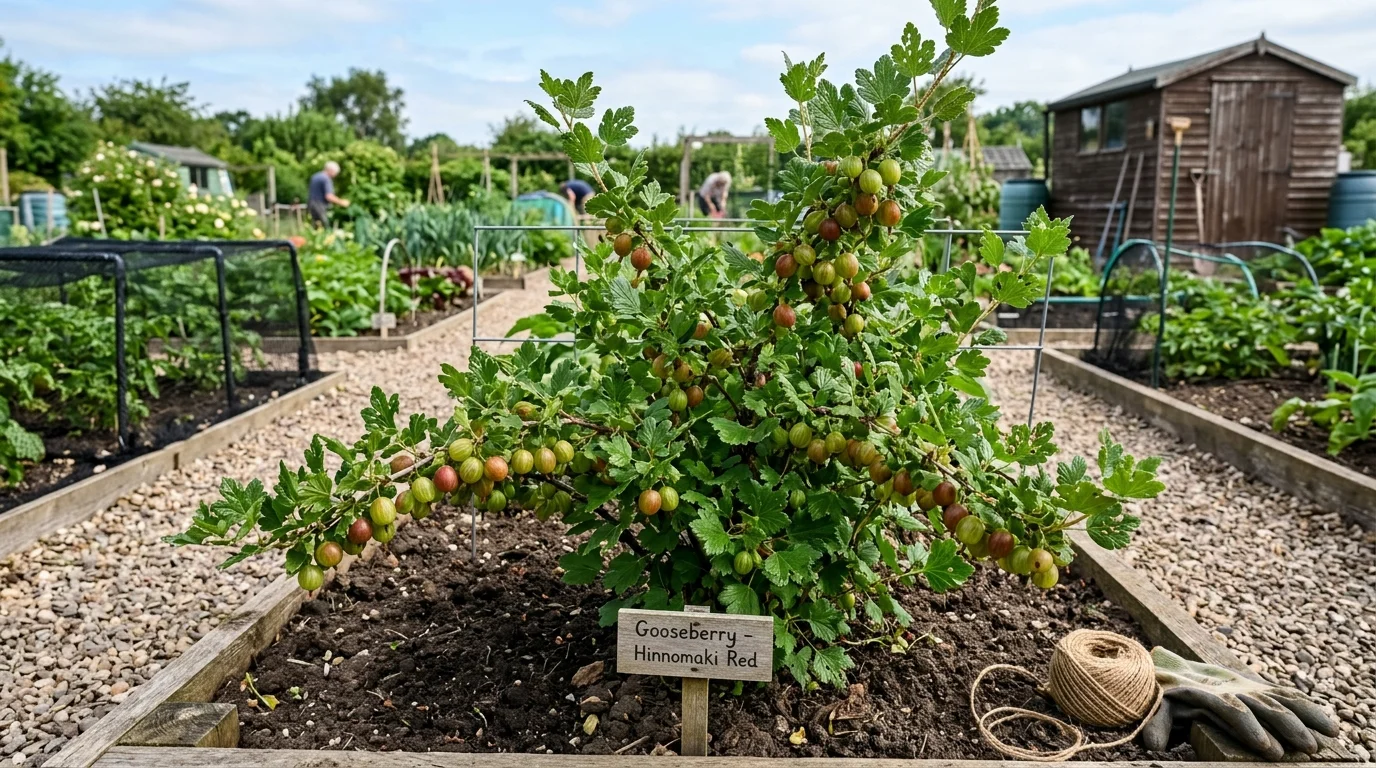
The key is to match the variety to your soil and taste. For dessert gooseberries (eaten raw, sweet and juicy), you want cultivars like ‘Invicta’ (heavy cropper, good for beginners) or ‘Hinnonmäki Red’ (disease-resistant, deep red berries). For cooking, ‘Whinham’s Industry’ is an old favourite, but I’ve had better success with ‘Greenfinch’ on heavy clay – it resists mildew better than most.
Real talk: If you’re growing gooseberries on an allotment for the first time, buy bare-root plants from a reputable UK supplier like R.V. Roger or Suttons in November or December. They’re cheaper, establish faster, and you’ll get a wider choice of varieties than potted stock in spring.
Planting bare-root gooseberries: timing, spacing, and soil prep
Bare-root bushes are dormant plants sold without soil around their roots. They’re the most cost-effective way to start an allotment fruit patch, but they demand a bit of planning.
When to plant: November to March, as long as the ground isn’t frozen or waterlogged. I aim for late November – the soil is still workable, and the roots have time to settle before winter.
Soil prep: Gooseberries hate waterlogged roots. They’ll develop root rot faster than you can say ‘wet spring’. On heavy clay like mine, I plant on a slight mound (15 cm high, 60 cm wide) to improve drainage. Dig in a bucket of well-rotted farmyard manure per square metre two weeks before planting. Do NOT add fresh manure – it will burn the roots.
Spacing: For a bush form (the standard shape), space plants 1.2-1.5 metres apart. If you’re training them as cordons (single stems against a wall or fence), you can squeeze them to 45 cm apart. Cordons are brilliant for small plots – they produce almost as much fruit as a bush but take up half the space.
Planting step-by-step:
- Soak the bare-root bush in a bucket of water for 2 hours before planting.
- Dig a hole wide enough to spread the roots out naturally – about 30 cm across.
- Place the bush so the soil mark on the stem (the old nursery soil line) sits at ground level. Planting too deep is the #1 killer of bare-root fruit.
- Backfill with soil mixed with a handful of bone meal (for slow-release phosphorus).
- Firm the soil with your heel, then water in well – even in winter.
- Mulch with 5 cm of organic matter (well-rotted compost, not bark) to suppress weeds and retain moisture.
Pro tip: Gooseberries are shallow-rooted. Don’t hoe around them during the growing season – you’ll damage the feeder roots. Hand-weed instead.
Pruning bushes: the make-or-break habit for big dessert gooseberries
I’ve seen plotters let their gooseberry bushes go wild for three years, then wonder why they only get pea-sized, sour fruit. Pruning bushes isn’t just about shape – it’s about forcing the plant to put energy into large, sweet berries rather than a tangle of spiny wood.
Gooseberries fruit on 2-3 year old wood, as well as on spurs on older wood. The aim is to create an open, goblet-shaped bush that lets light and air reach the centre. This reduces mildew (a common fungal issue) and makes picking easier.
Winter pruning (December-February):
- Remove any dead, diseased, or crossing branches – cut them back to the base.
- For a bush, aim for 6-8 main branches. Remove any that are older than 4 years (they’ll be dark and gnarled) to encourage new growth.
- Cut back branch tips by one-third to an outward-facing bud. This stimulates branching and fruiting spurs.
- Keep the centre of the bush open – imagine a birds’ nest shape.
Summer pruning (July-August):
- After you’ve harvested, cut all new side shoots back to 5 leaves (about 10 cm). This diverts energy into fruit buds for next year.
- Remove any shoots growing into the centre of the bush.
- This is also the time to take cuttings if you want more bushes – take 20 cm pieces of current-year wood, strip the lower leaves, and stick them in a sandy compost mix.
The ‘Gordon’ method: I recommend a hybrid approach for beginners. In the first two years, just focus on creating a strong framework. Years 3-5, do winter pruning to replace old wood. After year 5, you’ll be cutting out a third of the oldest branches every winter. This keeps the bush perpetually young and productive.
Gooseberry sawfly: the enemy you can’t ignore
If there’s one pest that makes plotters give up on gooseberries, it’s the gooseberry sawfly. The adult looks like a small wasp, but it’s the larvae that cause the damage. They hatch in spring (late April to June) and feed on the leaves, often stripping a bush completely in 24-48 hours. A defoliated bush won’t produce good fruit that year, and repeated attacks can kill it.
How to spot sawfly: Look for tiny green caterpillars with black spots on the underside of leaves. They start small (2 mm) and grow to 2 cm rapidly. They’re voracious.
Non-chemical control (start here):
- Inspect weekly from April. Run your hand along the underside of leaves. If you see caterpillars, pick them off or blast them off with a strong hose. For small plots, this is genuinely effective if you’re vigilant.
- Encourage natural predators. Ground beetles, hedgehogs, and birds love sawfly larvae. Leave a patch of wild grass or a log pile near your gooseberries to host them.
- Use netting. Fine insect netting (0.8 mm mesh) over the bush during the sawfly flight period (April-June) can exclude the adults. The downside: you need a frame to keep the net off the leaves, or the sawflies will lay eggs through the mesh.
Organic sprays (when needed):
- Spinosad-based products (e.g., ‘Doff Natural Bug Killer’) are approved for organic use in the UK. Spray at the first sign of caterpillars. It’s derived from a soil bacterium and breaks down quickly in sunlight.
- Nematodes (e.g., ‘Nemasys Fruit & Veg Protection’) are watered into the soil in spring. They target the pupal stage of sawfly in the ground, preventing adults from emerging. This is a preventative measure, not a cure for an active infestation.
Chemical control (last resort): If you’re not organic, a systemic insecticide like ‘Provado Ultimate Fruit & Vegetable Bug Killer’ works well. Apply in early May when larvae are small. But be aware – it will also kill beneficial insects, so only use if you have a severe, recurring problem.
My go-to strategy: I use a combination of nematodes in April and weekly handpicking in May-June. I’ve had zero sawfly damage for three years running. It works, but you have to be consistent.
Feeding and watering for dessert-quality berries
If you want dessert gooseberries (sweet enough to eat raw), you need to get the nutrition right. Too much nitrogen gives you leafy growth and sour fruit. The trick is a balanced feed in spring, followed by a potassium boost as the fruit develops.
Feeding schedule:
| Time | Feed | Why |
|---|---|---|
| March (as buds swell) | 50 g per sq m of general-purpose fertiliser (e.g., Growmore 7-7-7) | Provides balanced nutrients for growth. |
| May (as fruit sets) | 30 g per sq m of sulphate of potash | Potassium improves fruit sweetness and size. |
| July (after harvest) | Mulch with 5 cm of well-rotted compost | Feeds the soil for next year’s crop. |
Watering: Gooseberries need consistent moisture when the fruit is swelling (May to July). A dry spell in June can cause the berries to split or drop. I use a drip irrigation system on a timer – it’s cheap (around £30 from Harrod Horticultural) and saves hours of watering. On clay, water less frequently but deeply – once every 10-14 days if there’s no rain.
Common problems (and the real fixes)
1. Mildew (powdery mildew) – A white, powdery coating on leaves and fruit. It’s caused by poor air circulation and dry roots.
Fix: Prune for openness (see above). Water the soil, not the leaves. If it appears, spray with a bicarbonate solution (1 tsp per litre of water with a drop of washing-up liquid). For persistent cases, use ‘Blight-resist’ varieties like ‘Greenfinch’ or ‘Hinnonmäki Red’.
2. Fruit splitting – Usually from irregular watering after a dry spell.
Fix: Mulch heavily in spring to buffer moisture. Water consistently from May to July.
3. Birds – They’ll strip your dessert gooseberries just as they ripen.
Fix: Net the entire bush with 2 cm mesh bird netting in June. Use a frame or canes to keep the net off the fruit – birds can peck through if it’s touching.
Harvesting and using dessert gooseberries
When to pick: Dessert varieties are ready when they’re fully coloured (pink, red, or golden, depending on variety) and yield slightly to gentle pressure. For cooking, you can pick them earlier (still green and firm).
How to pick: Wear thick gloves! Gooseberry thorns are no joke. Use two hands – one to hold the branch, one to gently twist the berry off. They keep in the fridge for 2-3 weeks, or freeze beautifully. I freeze them on a tray in a single layer first, then bag them – this stops them clumping.
My favourite use for dessert gooseberries: Fold them into a simple crumble with a 50:50 oat and flour topping. The tartness of the berries cuts through the sweetness perfectly. Or, if you’re feeling fancy, stew them lightly with honey and a vanilla pod, then spoon over Greek yoghurt.
Final word: grow smarter, not harder
Gooseberries are a classic allotment crop for good reason. They ask for little – a sunny spot, decent drainage, and a bit of pruning savvy – and give you a reliable, high-value harvest for over a decade. The gooseberry sawfly is the only real threat, but with early detection and the nematode strategy, you can beat it without reaching for harsh chemicals.
Plant a bare-root bush this winter. Prune it like I’ve shown you. And in 18 months, you’ll be eating the best dessert gooseberries of your life – picked from your own plot, with your own hands.
FAQ: Quick answers for gooseberry growers
Q: How long does it take a bare-root gooseberry to fruit?A: Expect a small crop in year 2, and a full crop (4-5 kg) from year 4 onwards.
Q: Can I grow gooseberries in a container on a patio?A: Yes, but use a 30-40 litre pot and a loam-based compost (e.g., John Innes No. 3). They’ll need more watering and feeding than in the ground.
Q: My gooseberry bush has red spots on the leaves. Is that sawfly?A: No – red spots are usually a fungal issue called ‘gooseberry leaf spot’. It’s rarely serious. Remove infected leaves in autumn and burn them. Sawfly leaves are chewed, not spotted.
Q: Can I move an established gooseberry bush?A: Yes, in winter when dormant. Dig up as much of the rootball as possible (at least 40 cm diameter). Replant immediately and water well. It may take a year to recover full vigour.
For more UK-specific fruit-growing advice, check out the RHS guide to gooseberries and the Garden Organic page on sawfly control.