You spent a tenner on a bag of seed compost, only to find it’s full of peat and your seedlings damp off. There’s a better way.
Let’s be honest: the stuff they sell as “seed compost” is often a bag of disappointment. It’s either too rich, too dry, or packed with peat that’s terrible for the planet and your bank account. As someone who’s managed a 20-plot allotment in Yorkshire through rain, wind, and the occasional barmy heatwave, I’ve learned one golden rule: the best growing medium is the one you make yourself for free. And that means learning to make leaf mould for allotments.
This isn’t just a fancy way to tidy up your plot. Leaf mould is the unsung hero of the allotment world. It’s a soil conditioner, a moisture retainer, and—if you do it right—the perfect base for a seed-sowing mix that rivals anything from the garden centre. Forget the romanticism of “just pile up some leaves and wait.” I’m going to show you the science-backed, practical method to turn rotting autumn leaves into the ultimate free resource.
Why leaf mould beats bagged compost every time
First, let’s kill a myth. Leaf mould is not compost. It’s a different beast. Compost is a hot, fast process driven by bacteria that breaks down kitchen scraps and green waste into a nutrient-rich soil amendment. Leaf mould is a slow, cool process driven by fungi. The result? A substance that holds up to 500% of its weight in water, improves soil structure on heavy clay, and has a near-neutral pH. For a UK plotter, that’s like striking gold.
For The New Plotter staring at a patch of rock-hard clay, a 2-inch mulch of leaf mould will transform that ground in one season. For The Thrifty Grower, it replaces the need to buy expensive water-retaining gels or soil conditioners. And for The Eco-Warrior, it’s a closed-loop, carbon-negative system that feeds your soil without a plastic bag in sight. The key is in how you collect and process those leaves.
Step 1: The collection – target the right leaves, ditch the rest
Not all leaves are created equal. You want leaves that break down relatively quickly—within 12 to 24 months. The MVPs here are oak, beech, hornbeam, and birch. These have a good carbon-to-nitrogen ratio and are thin enough to rot efficiently.
Avoid these troublemakers at all costs:
- Horse chestnut – tough, leathery, and take forever to break down.
- Holly, ivy, and laurel – waxy coatings resist fungal attack.
- Walnut – contains juglone, a natural herbicide that can stunt seedlings.
- Conifer needles – too acidic and slow to decompose for a balanced mix.
Your best source is your own plot if you have trees, but don’t stop there. Grab a sturdy tarp and a rake, and hit your local park or street. Always ask permission from your council if collecting on public land—it’s usually fine, but be polite. The trick is to collect when the leaves are dry. Wet leaves clump, go slimy, and are a nightmare to handle. A dry autumn day with a stiff breeze is your friend.
Pro tip from the plot: Shred your leaves if you can. Run over a pile with a lawnmower (catch bag on) or use a dedicated leaf shredder. Shredding increases the surface area for fungi, cutting decomposition time from 2 years to as little as 6 months. It’s the single best thing you can do to speed things up.
Step 2: The structure – build a wire bin that breathes
Plastic bags are a common mistake. Leaves need air to rot properly. If you stuff them into a black bin liner and tie it shut, you create an anaerobic environment that produces a slimy, stinking mess. The correct solution is a simple wire bin.
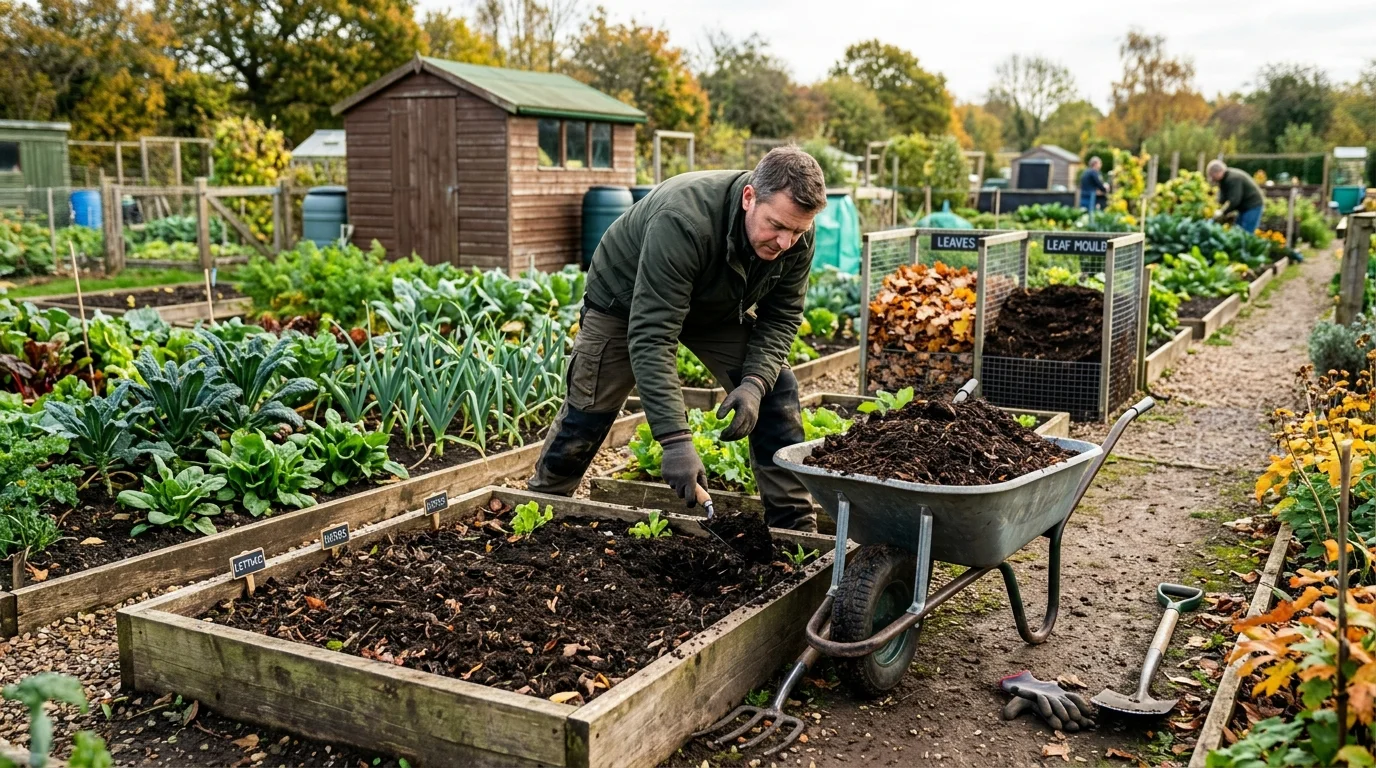
Grab a roll of chicken wire or galvanised mesh (25mm or 50mm gauge works well). Make a cylinder about 1 metre in diameter and 1 metre high. Secure the ends with twist ties or wire. Place it on bare soil in a shady, damp corner of your plot. The soil base is crucial—it lets worms and beneficial microorganisms migrate up into the leaves and get the process started.
Fill the bin loosely. Don’t compact the leaves. You want air pockets. If the pile is bone dry, give it a good soaking with the hose, but don’t drown it. It should feel like a wrung-out sponge. Then, cover the top with an old carpet square, a piece of thick cardboard, or a tarp. This keeps the moisture in and stops the wind from scattering your hard work.
Why not a plastic bag? Simple: wire bins allow for gas exchange. The fungi that break down leaves need oxygen. A sealed bag creates a sour, acidic sludge. I’ve opened two-year-old bagged leaves that smelled like a silage pit. The same leaves in a wire bin smelled like a woodland floor—earthy, rich, and ready to use.
Step 3: The patience – what happens over 12 to 24 months
Here’s the reality check: leaf mould takes time. There’s no shortcut. But the timeline is predictable.
After 6 months: The leaves will have broken down into a coarse, crumbly material. It’s not ready for seed sowing yet, but it’s perfect as a surface mulch. Spread it 2-3 inches thick around established perennials, fruit bushes, or overwintering brassicas. It’ll suppress weeds and retain moisture.
After 12 months: You’ll have a finer, darker material. This is what I call “gold dust.” It’s now suitable for seed sowing—if you sieve it. Pass it through a 10mm riddle to remove any twigs or uncomposted bits. The fine fraction is the base for your ultimate seed compost.
After 24 months: You get a silky, almost soil-like product that can be used straight. This is the holy grail. It’s perfect for potting on, as a component in raised beds, or as a top dressing for lawn patches.
The ultimate seed sowing mix – free and peerless
This is where we get serious. Most commercial seed composts contain high levels of peat or coir, with added fertiliser. Leaf mould on its own is great, but it’s low in nutrients. For seed germination, that’s actually a benefit—you don’t want rich soil for tiny seedlings. You want a sterile-like, free-draining medium that holds moisture.
Here’s my tested formula, based on RHS trials and my own 15 years of fiddling:
| Component | Ratio (by volume) | Why it works |
|---|---|---|
| Sieved leaf mould (12+ months) | 2 parts | Provides structure, moisture retention, and beneficial fungi |
| Sharp sand or fine grit | 1 part | Ensures drainage and stops damping off |
| Coarse vermiculite (optional) | 1 part | Improves aeration and water holding without compaction |
| Garden compost (sieved) – only if you have it | 1 part | Adds a tiny nutrient kick for after germination |
Mix dry, then water lightly before filling seed trays. Do not use fertiliser. New seeds don’t need it. The leaf mould provides enough microbial activity to get them going. I’ve used this mix for everything from tomatoes to parsnips, and the germination rates are consistently higher than any bagged peat-free mix I’ve tried.
For a deeper dive into the science of seed starting, check the RHS seed-sowing advice page—it’s a solid reference.
Pest and problem management – what can go wrong
Even with the best intentions, things can go sideways. Here’s the reality:
Problem 1: The pile goes slimy and smells like vinegar. This means it’s too wet and anaerobic. Solution: Unload the bin, spread the leaves on a tarp for a day to dry out, then rebuild the pile. Add some ripped-up cardboard or straw to improve airflow.
Problem 2: It’s full of weeds. Leaf mould should be weed-free if you collected clean leaves. If you see nettles or brambles, you’ve collected ground-level debris. Next year, be more selective. The good news: the fungal process kills most weed seeds over time.
Problem 3: Slugs love it. They will. A damp leaf mould heap is a five-star hotel for molluscs. Don’t panic. This is actually a feature, not a bug. Use the heap as a trap crop. Check it weekly and remove the slugs. Or, if you have chickens, let them scratch through the pile—they’ll feast and turn the leaves for you. For The Eco-Warrior, Garden Organic’s slug control page has excellent biological control advice.
Seasonal timing – when to start
Autumn is the obvious season, but you can start collecting leaves from September through December, depending on your trees. The best practice: start collecting as soon as the first major leaf fall hits, usually mid-October in most of the UK. This gives you the maximum window to build your bin before winter sets in.
If you miss the autumn window, don’t despair. You can collect leaves from evergreens like holly (though they take longer) or even source them from a friendly neighbour’s garden. I’ve had success collecting leaves as late as February from wind-blown drifts.
The bigger picture – why this matters for your plot
We’re in an era where peat compost is rightly being phased out, and bagged alternatives are expensive and inconsistent. Making leaf mould for allotments is one of the few truly free, high-quality resources available to any plotter. It builds resilience into your growing system. It reduces your plastic waste. And it connects you to the natural cycle of your plot.
Start small. One wire bin. Collect a few bags of leaves this autumn. By the time next spring rolls around, you’ll have a coarse mulch. By the following year, you’ll have the finest seed compost you’ve ever used. And you’ll never look at a bag of garden centre compost the same way again.
Your plot is your lab. The leaves are your raw material. Get out there and start building your gold mine.
Frequently Asked Questions about making leaf mould for allotments
Q: Can I use leaf mould straight away as a seed compost?
A: No. Fresh leaves are too coarse. You need at least 12 months of rotting to get the fine texture needed for seed germination. Use fresh leaves only as a mulch.
Q: Should I add activator or nitrogen to speed it up?
A: No. Leaf mould is a fungal process. Adding grass clippings or compost activator changes it to a bacterial process, turning it into regular compost. You’ll lose the unique properties of leaf mould.
Q: My leaves are from a street with dog mess. Is that safe?
A: Avoid it. Dog waste can contain pathogens. Stick to leaves from parks, gardens, or your own plot.
Q: How many bins should I have?
A: A good rule is one bin per 200 square feet of plot, staggered by one year. So if you have a 10-rod plot, aim for 3 bins: one filling, one finishing, one ready to use.
Q: Can I use the leaf mould for ericaceous plants like blueberries?
A: Leaf mould from oak or beech is naturally slightly acidic (pH 5.5-6.0), making it excellent for acid-loving plants. Avoid adding lime if using for blueberries or rhododendrons.