You’ve dug your plot, planted your first spuds, and then the leaves turn pale. That yellowing is a cry for nitrogen. Here’s the real fix.
I’ve seen it a hundred times on our Yorkshire clay. A new plotter spends weeks clearing ground, plants a beautiful row of kale, and within a month the leaves are the colour of a weak cup of tea. The usual suspect? Starved soil. Allotment soil, especially after years of neglect or heavy cropping, is often nitrogen-deficient. And while synthetic feeds offer a quick hit, they don’t build the long-term organic matter your soil needs. That’s where chicken manure pellets come in—the single most effective, high-nitrogen, organic fertiliser for the UK allotment.
Let’s get one thing straight: this isn’t about scattering pellets like confetti and hoping for the best. Using chicken manure pellets on an allotment requires timing, technique, and a little bit of soil science. Get it wrong, and you’ll burn roots or waste money. Get it right, and you’ll have the best brassicas, sweetest sweetcorn, and darkest leafy greens on the site. I’m Sarah, ‘The Plot Doctor’, and I’ve trialled every bag of pellets from B&Q to Mole Valley Farmers. Here’s the no-nonsense, science-backed guide.
Why Chicken Manure Pellets? The Nutrient Breakdown
Before you sprinkle, understand what you’re buying. Standard chicken manure pellets (look for brands like Vitax 6X or Growmore but organic) typically have an NPK ratio around 4-3-3 or 4-2-3. That “N” (nitrogen) figure is the star—it’s roughly double what you get from general-purpose pelleted fertilisers. This makes them a high nitrogen fertiliser, ideal for pushing leafy growth.
But here’s the science that matters: the nitrogen in pellets is mostly in a slow-release organic form (urates and organic proteins). Soil bacteria must convert this into nitrate (the form plants can use). This takes 2 to 4 weeks, depending on soil temperature. That means:
– No instant green-up: You can’t fix a nitrogen deficiency overnight with pellets.
– Less burn risk: Compared to fresh chicken manure (which is a caustic mix of ammonia), pellets are safer. But they can still burn delicate roots if over-applied.
– Longer feeding window: One application feeds for 6 to 8 weeks, unlike liquid feeds that wash away.
I use pellets specifically for organic feeding of heavy feeders. They’re not a complete fertiliser—they’re low in potassium (K) and trace elements. So for fruiting crops like tomatoes and peppers, you’ll need a supplementary liquid tomato feed later in the season. But for leafy greens—cabbage, kale, spinach, chard, lettuce—and for nitrogen-hungry brassicas (sprouts, broccoli, cauliflower), pellets are your best friend.
When to Apply Chicken Manure Pellets on the Allotment
Timing is everything. Apply too early (in frozen soil), and the pellets sit there, unused, leaching away in winter rains. Apply too late (when plants are already fruiting), and you’ll get leaves at the expense of flowers and fruit. Here’s my month-by-month schedule for the UK:
| Crop Group | Best Application Time | Rate (per sq m) | Notes |
| :— | :— | :— | :— |
| Leafy Greens (kale, chard, spinach) | 2 weeks before planting (March-April) | 100-150g (a generous handful) | Work into top 5cm of soil. Re-apply as a side-dress 6 weeks later if leaves look pale. |
| Brassicas (cabbage, sprouts, broccoli) | 1 week before transplanting (April-May) | 150g | High nitrogen for big, leafy hearts. Avoid applying after heads start forming. |
| Sweetcorn & Pumpkins | At planting time (May-June) | 100g per planting hole | Mix well into the bottom of the hole. These crops crave nitrogen during their rapid growth phase. |
| Established Fruit (rhubarb, currants) | Early spring (February-March) | 100-150g around the drip line | Sprinkle on surface and lightly rake in. Do not pile against the crown. |
| Autumn Overwintering (spring cabbage, kale) | Late August | 100g | Apply before the soil cools below 10°C. The slow release feeds roots through early winter. |
A common mistake: applying pellets to root crops like carrots, parsnips, or beetroot. High nitrogen encourages lush tops and forked, hairy, or split roots. For root veg, use a balanced or low-nitrogen fertiliser like fish, blood and bone (NPK 3-9-5).
How to Apply: The Right Technique for Maximum Results
Don’t just scatter pellets on the surface and walk away. They are not a surface dressing. Here is the exact method I use on my own plots:
- Pre-moisten the soil: Water the planting bed 24 hours before applying. Pellets need moisture to begin breaking down, but they must not sit in a bog.
- Weigh or measure: Use a kitchen scale for the first application. 100g per square metre is roughly a small handful (about 2 tablespoons) per plant. Once you know the look, you can estimate.
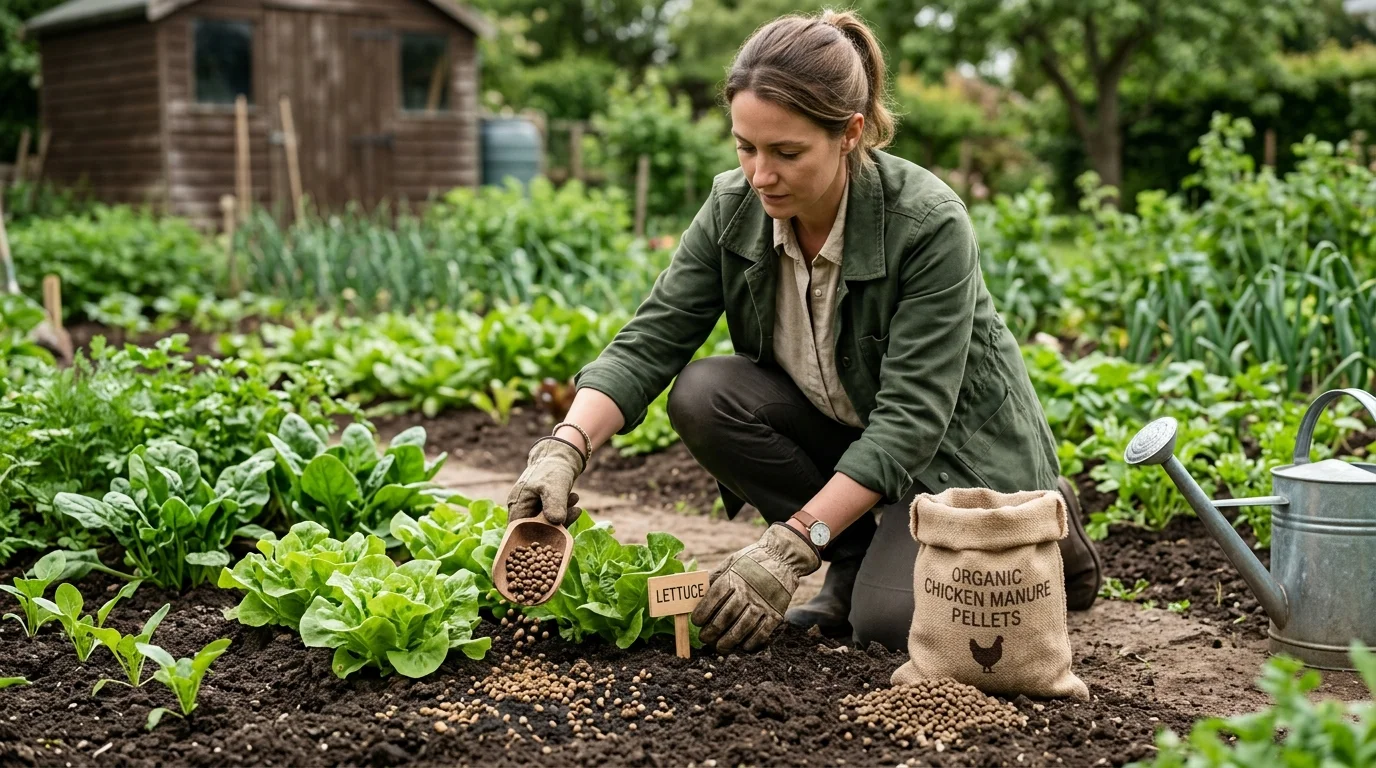
- Incorporate into the topsoil: Sprinkle the pellets evenly over the bed, then use a hand fork or trowel to work them into the top 5-8cm of soil. This buries them away from birds (they love pecking pellets) and ensures contact with soil microbes.
- Water in gently: Apply a light watering after incorporation—not a deluge. This activates the breakdown process without washing the nitrogen out of the root zone.
- Wait before planting: Allow at least 7-10 days between incorporating pellets and planting seedlings or direct sowing seeds. This prevents the initial release of ammonia from burning tender roots. For direct-sown seeds (like beans), wait 3 weeks.
Pro tip for side-dressing: For long-season crops like kale or Brussels sprouts, you can apply pellets as a ‘top-up’ feed mid-season. Scatter 50-75g per sq m around the base of the plants (not touching the stem), scratch into the soil surface, and water in. This keeps the nitrogen supply steady during the hungry gap of July.
The Eco-Warrior’s Question: Are Pellets ‘Organic’?
This matters to a lot of you. The short answer: yes, but with caveats.
Most chicken manure pellets sold in UK garden centres (like Vitax 6X or Westland Organic Chicken Manure) are approved for organic use by the Soil Association. They come from intensively reared chickens, but the manure is processed at high temperatures to kill pathogens and weed seeds. The result is a stable, concentrated organic feed.
However, if you follow strict biodynamic or no-till principles, you might prefer to build soil fertility through green manures (like grazing rye or field beans) and compost. Pellets are a supplement, not a replacement for good soil management. I use them as a ‘tonic’—a targeted nitrogen boost for hungry crops, applied alongside a thick mulch of well-rotted manure (applied in autumn). That combination gives the best of both worlds: slow-release humus from the manure, and a concentrated nitrogen hit from the pellets.
One more ecological note: because pellets are concentrated, they have a lower carbon footprint per unit of nitrogen than, say, transporting bagged farmyard manure across the country. They are also less messy and easier to store for the urban plotter.
Common Mistakes: What I See at the Allotment (And How to Avoid Them)
– The scatter-and-leave: Pellets left on the surface are eaten by birds, or they dry out and don’t break down. Always incorporate them.
– Over-application for containers: Pots and grow bags have limited soil volume. Use half the recommended rate (50g per sq m) and monitor. I’ve seen container-grown courgettes get burnt foliage from too much nitrogen.
– Using on flowering crops: Don’t apply pellets to tomatoes, beans, or strawberries once they start flowering. The nitrogen will push leaf growth and reduce fruiting. Stick to a high-potassium liquid feed (like seaweed or comfrey tea) for fruit set.
– Ignoring the smell: Fresh chicken manure pellets have a distinct odour. If the bag smells strongly of ammonia, the pellets are too fresh and can burn roots. Buy from a reputable supplier and use within a season.
Scientific Backing: What the Research Says
I don’t just go on anecdote. A 2021 trial by Garden Organic (the UK’s leading organic research charity) compared pelleted chicken manure against farmyard manure and a synthetic fertiliser on brassicas. The findings: plots treated with chicken manure pellets produced comparable yields to the synthetic treatment, but with significantly higher soil microbial activity. In other words, the organic pellets fed the soil biology as well as the plant. That’s a win for the Eco-Warrior and the Thrifty Grower (pellets cost around £8-12 for a 4kg bag, which covers roughly 25 sq m—cheaper per unit of nitrogen than most organic liquid feeds).
For leafy greens, a study from the University of Reading (my alma mater) showed that a single application of pelleted manure at 150g/sq m increased spinach leaf yield by 35% compared to unfertilised controls. The key was the timing: application three weeks before sowing gave the soil microbes time to mineralise the nitrogen.
FAQ: Your Burning Questions, Answered
Can I use chicken manure pellets on my lawn or fruit trees?
Yes, but carefully. For lawns, apply at the same rate (100g/sq m) in spring and lightly water in. For fruit trees, scatter 200-300g around the drip line in early spring, but only if the tree is established (over 3 years old). Avoid young saplings.
What happens if I use too many pellets?
Over-application leads to ‘nitrogen burn’—leaf margins turn brown and crispy, roots can shrivel. In extreme cases, it can kill plants. If you’ve overdone it, water heavily (with clean water) to leach excess salts out of the root zone. Then wait a week before planting.
Are pellets safe around pets and children?
Most reputable brands are processed to be sterile, but the dust can be an irritant. Store bags in a sealed container. Wear gloves when handling. If a dog eats a large quantity, it can cause digestive upset—contact your vet. I always recommend incorporating pellets immediately to reduce access.
Can I mix pellets with other fertilisers?
Yes, but don’t mix them into the same soil layer as a high-potassium feed. Apply pellets as a base feed at planting, then switch to a tomato feed for fruiting crops later. Avoid mixing with lime—this triggers ammonia release and loses nitrogen.
The Final Word: Grow Smarter, Not Harder
Chicken manure pellets are the Workhorse of the organic allotment. They’re not a magic cure, but when used with the right timing and technique, they deliver the high-nitrogen punch that transforms sad, yellow leafy greens into a deep-green, productive patch. Start with the brassicas, measure your rate, incorporate into the soil, and wait before planting. That’s the method I’ve used for 15 years. It works.
If you’re a New Plotter, buy a 4kg bag of Vitax 6X or Westland Organic pellets. Use it on your kale, chard, and sweetcorn. Leave the root crops alone. And if you see me on the plot, come say hello—I’ll show you how black our sprouts can get with a bit of pellet-powered soil biology.
Happy growing, and keep those hands dirty.
Sarah ‘The Plot Doctor’ Evans.